The AI smart features can be configured in a ZIP recorder or directly in the browser interface of the camera (standalone)
Only one smart detection feature can be enabled at any given time.
See the NVR or DVR manual for information on configuring these features with a ZIP recorder.
Follow the steps below for configuring the settings directly in the camera via a browser for standalone setup.
You will need...
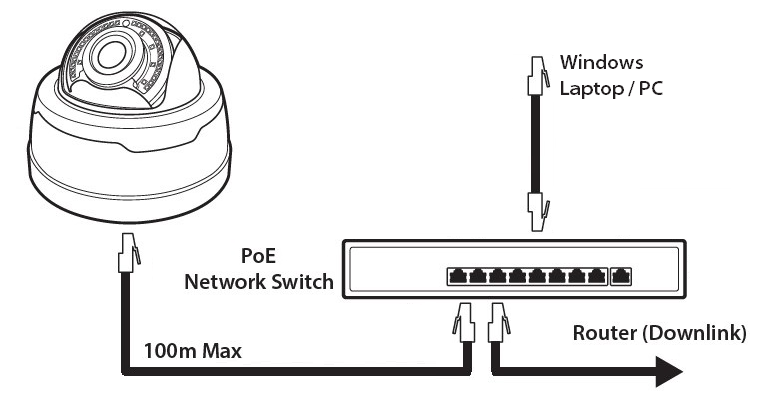
•Windows Based PC/ Laptop connected to router/ PoE switch
•ZipVision Pro App on Mobile Device
•PoE Switch connected to Network/ Router
•Ethernet network cable
•ZipFinder software, available via this link below:-
www.softcctv.com/store/Item/Zip-Finder-IP-CCTV-Security-Camera-Discovery-Tool
NOTE If the PC being used is on a different IP range to the PC then add the IP range of the camera to the PC using the below guide:-
PDF Version :- http://www.cctvmanuals.com/pdf/tips/How_to_add_an_IP_Range.pdf
HTML Version :- http://www.cctvmanuals.com/tips/How_to_add_an_IP_Range/index.html
1. Plug the camera's RJ45 port with a network cable into a PoE switch

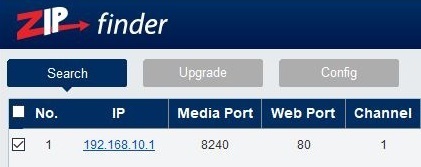
2. Using ZipFinder on a Windows Based PC/ Laptop Search and then tick the camera

3. Select Net Mode = DCHP, then click Modify

4. Search again, to get the updated IP address.
5. Select the IP address of the camera, Internet Explorer will pop-up, and ask to download and install the plug-in.
6. Download, install and follow the steps for the plug-in installation, then re-load the browser by selecting the IP address again.
5. Login to the IP Camera, the default login details are:-
Default IP |
192.168.10.1 |
DCHP |
Off |
User Name |
admin |
Password |
777777 |