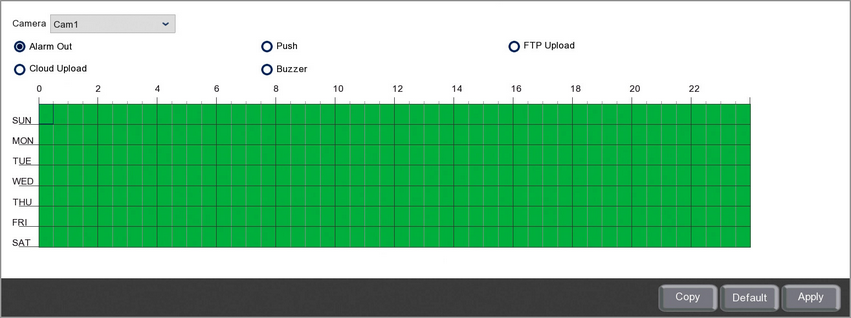
From the Alarm Schedule sub-menu you can create a unique timetable to tell the recorder when alarm triggered events should be active for each camera.
For example, you may have motion detection configured on camera 1 so that when movement is detected one of the recorders alarm outputs is triggered and a snapshot is uploaded to an FTP server. With an alarm schedule this could be set to only happen at night, outside of business hours, when no staff members are on site.
If you were to schedule alarm outputs for camera 1 to be active between 7pm and 7am, any events where camera 1 would trigger an alarm output will only do so during these hours.

Camera
Select the camera you want to create an alarm schedule for form the Camera drop down list..
Trigger Event
For maximum flexibility you can create individual alarm schedules for 5 different alarm triggered events listed below:
•Alarm Out - any alarm outputs the camera is set to trigger.
•Push - any time an event should send a push notification to the Zip mobile app.
•FTP Upload - image or video uploads to an FTP server for the chosen camera.
•Cloud Upload - image or video uploads to an cloud storage account for the chosen camera.
•Buzzer - any time the recorder should produce a loud beeping alert.
To select the trigger event you want to create a schedule for simply click the radio button trigger event type.
Editing A Schedule
By default each trigger event type is scheduled to be active 24 hours a day, 7 days a week.
Removing A Schedule
To remove a schedule follow these simple steps:
1.Click the radio button for the trigger event type you want to remove.
2.Click and drag over the time period you want to remove the scheduled trigger event from. You can drag over multiple days at once if needed.
Creating A Schedule
To create a schedule or add to an existing schedule follow these simple steps:
1.Click the coloured radio button for the trigger event type you want to create the schedule for.
2.Click and drag over the time period you want to schedule the trigger event to be active. You can drag over multiple days at once if needed.
Copying Alarm Schedules From One Camera To Another
Rather than re-creating the same schedule for each camera you can copy schedules from one camera to another by clicking the Copy button. For more information on copying schedules see the Parameter Copy section.
Defaulting Settings
You can restore settings back to their default value by clicking the Default button.
Saving Changes
Once you are happy with your schedules click the Apply button to save them. Alternatively you can right click with the mouse to exit the Record Schedule screen without saving changes.