Note: ZIP SUPA and XTRA recorders have "Coaxitron" so the RS485 cables and Address ID Setting may not be required (depending on your install).
IMPORTANT - Once the address settings have been set on the dip switches (as per below), remove power from the PTZ and then power the PTZ up (reboot the PTZ). This applies the ID and baud rate settings.
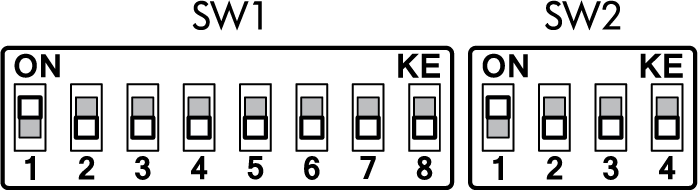
The cameras Baud Rate, ID and Terminal Resistor are all controlled using dip switches located on the underside of the dome, above the lens.
Unscrew the two screws and remove the clear plastic cover to gain access to the dip switches. See Installation for location of dip switches.
There are two sets of dip switches.
•SW1 is used to configure the camera’s ID.
•SW2 is used to configure the camera’s baud rate and terminal resistor.
ID Setup
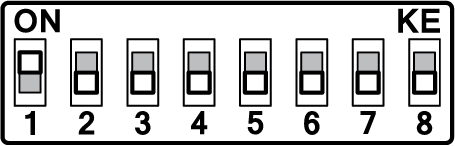
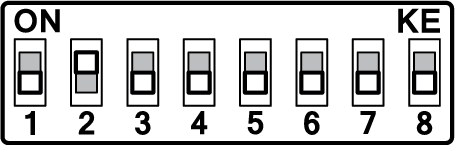
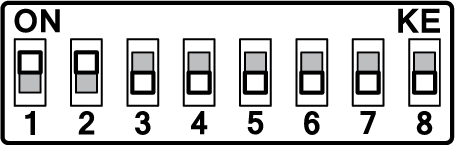
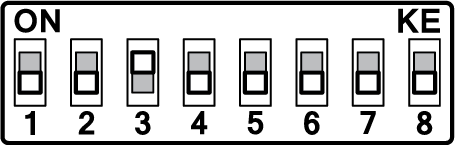
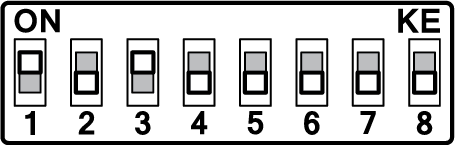
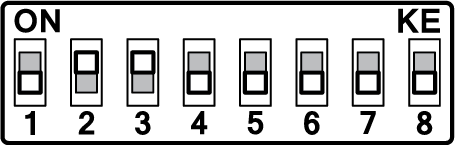
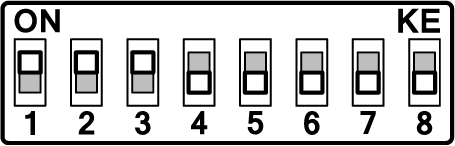
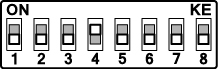
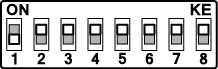
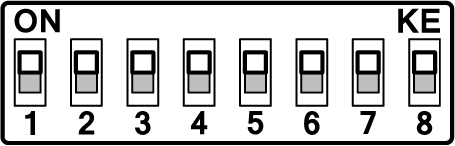
The camera’s ID (Address) is configured using the SW1 set of eight dip switches. SW1 uses a binary system where switch 1 represents the number 1, through to switch 8 representing the number 128. Each PTZ on a system must have its on unique ID. Examples of how to set the camera’s ID are shown below
|
|
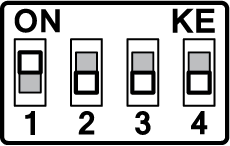
PTZ address number 1
|
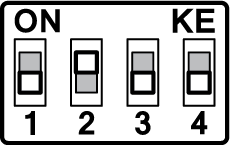
PTZ address number 2
|
|
|
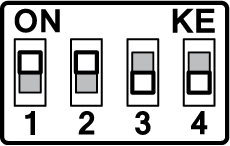
PTZ address number 3
|
PTZ address number 4
|
|
|
PTZ address number 5
|
PTZ address number 6
|
|
|
PTZ address number 7
|
PTZ address number 8
|
|
|
PTZ address number 254 |
PTZ address number 255 |
Baud Rate Setup
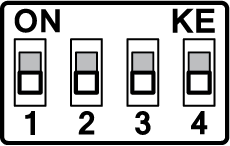
Setting the Baud Rate is done using the SW2 set of four dip switches. The Baud Rate can be set to 2400bps, 4800bps, 9600bps or Auto as shown below.
|
|
|
|
2400bps |
4800bps |
9600bps |
Auto |
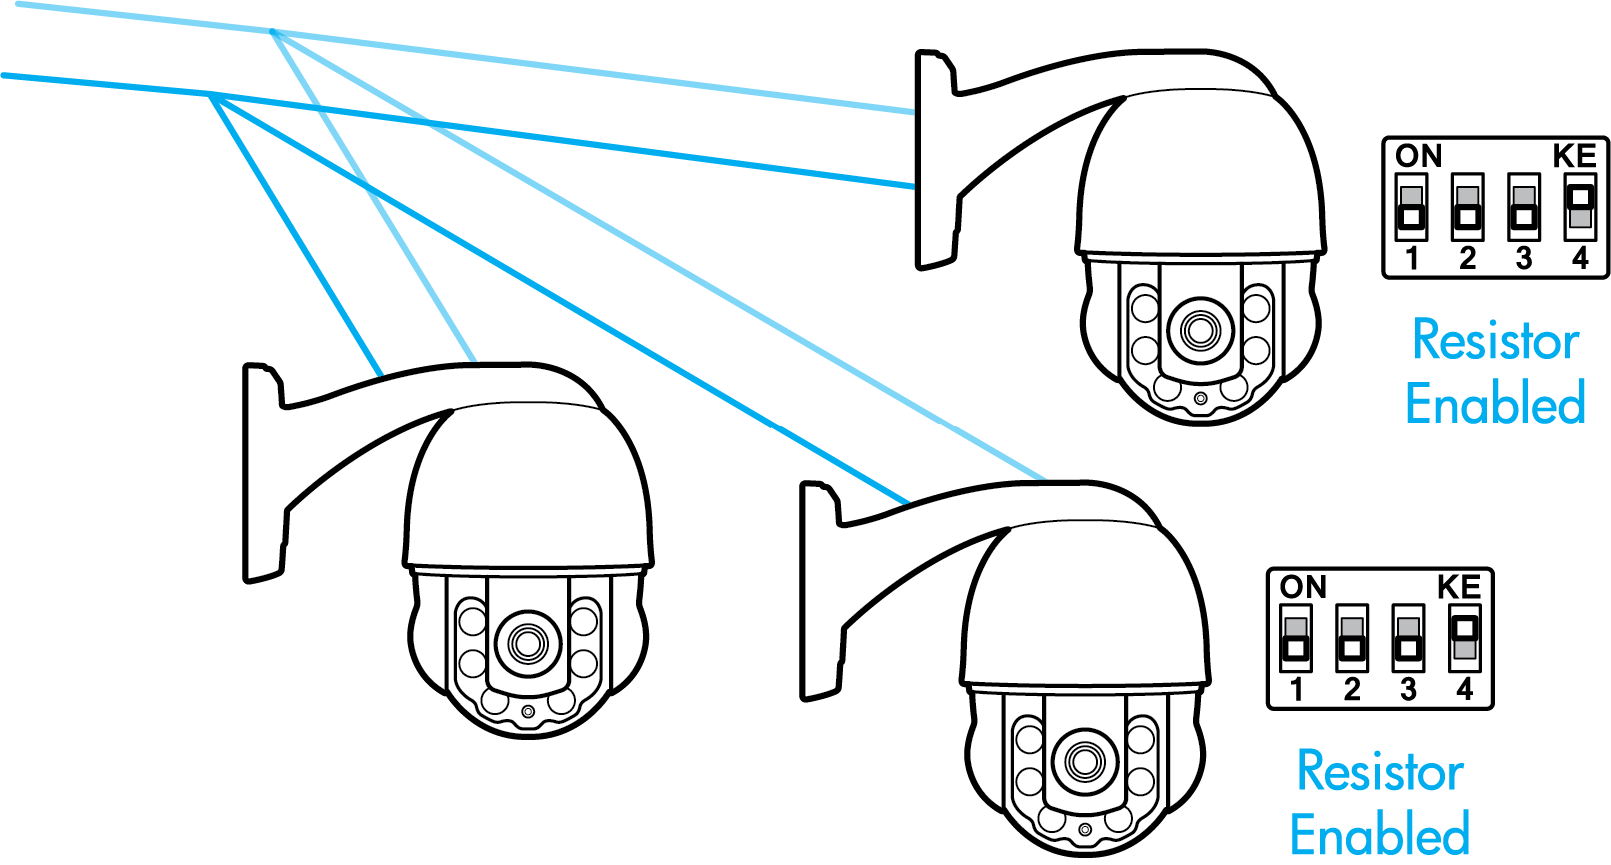
Terminal Resistor Setup
The PTZM600 has an in-built 120Ω terminal resistor. When setting up multiple PTZs, certain PTZs must have their resistors enabled.
When setting up PTZs in a Daisy Chain formation the last PTZ must have its resistor enabled. If you decide on a Star formation the two furthest PTZs must have their resistors enabled.
|
|
Resistor Disabled |
Resistor Enabled |


Daisy Chain Formation
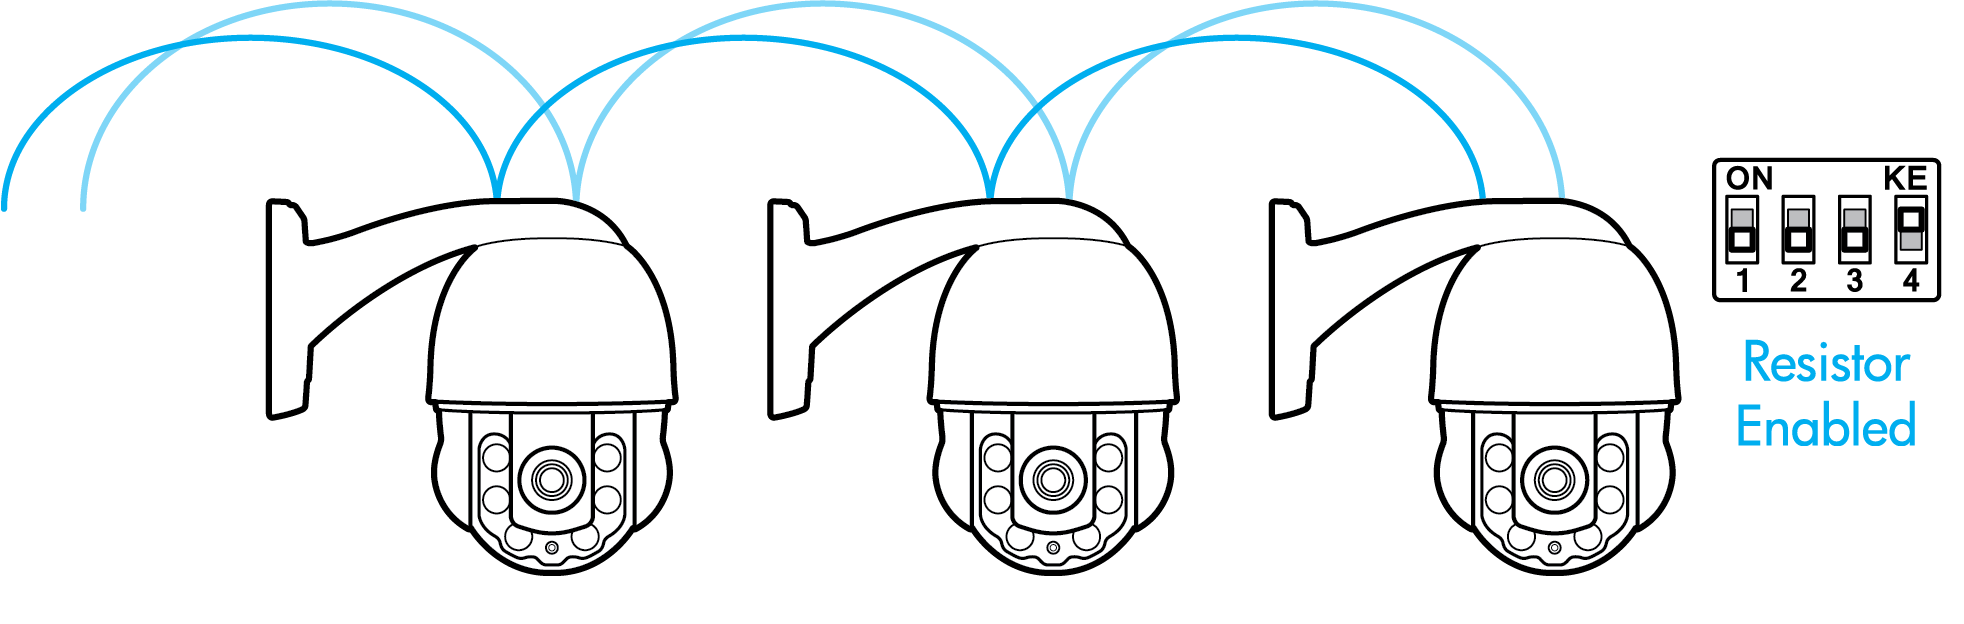
Star Formation
IMPORTANT - Once the address settings have been set on the dip switches (as per below), remove power from the PTZ and then power the PTZ up (reboot the PTZ). This applies the ID and baud rate settings.