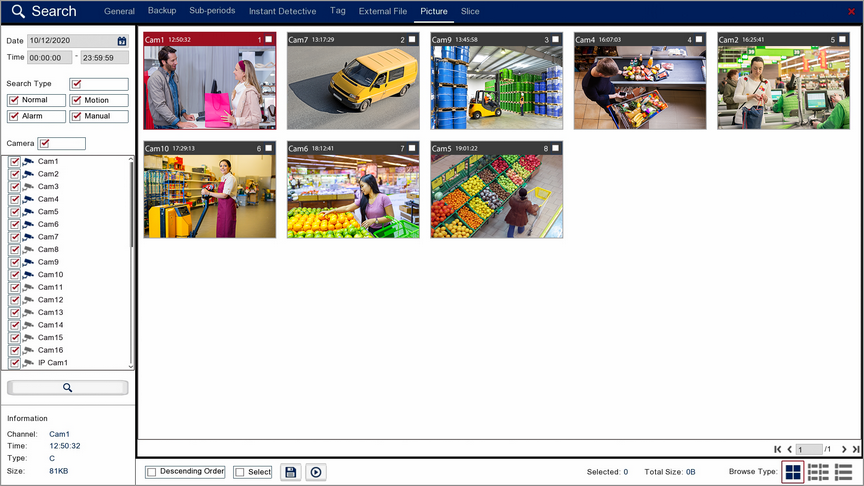
In the Picture Playback screen you can search for and view your previously captured snapshots. Snapshots can be saved using the Manual Capture button during Live View or in the Playback screen.
You can also configure cameras to capture snapshots at set intervals in the Capture screen. Once you have set the capture parameters you will also need to setup a schedule to automatically capture snapshots for Normal, Alarm and Motion Detection in the Capture Schedule screen.

Date & Time
when you open the Picture screen it will automatically start on the current day with the time set from 00:00 to 23:59 to cover the full days recordings.

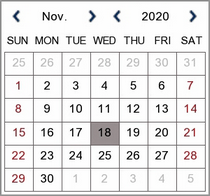
To set a different start or end date click the Calender icon to display the calender screen as shown below.

You can change the month and year using the blue arrows then select a date by clicking on it.
Search Type
Choosing the Search Type allows you to filter which snapshots are displayed based on what triggered the snapshot to be captured in the first place. For example, if you only select Alarm you will only see snapshots which were captured as the result of an alarm trigger. By default all search types are selected. You can select any combination of search types or you can tick and untick the box next to Search Type to select or deselect all search types.

Normal: Shows all snapshots captured at set intervals as configured in the Capture screen.
Motion: Only shows snapshots which were captured as the result of a Motion Detection trigger.
Alarm: Only shows footage which was captured as the result of an Alarm Trigger.
Manual: Only shows footage which was captured manually by pressing or clicking the Manual Capture button.
Camera Selection
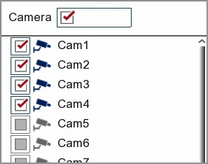
You can choose which cameras you want display snapshots from by ticking and unticking the check boxes next to the cameras. Cameras which capture snapshots on the selected date will be greyed out and unavailable for selection. You can select any combination of cameras or you can tick and untick the box next to Cameras to select or deselect all cameras.

Once you are ready click the Search button to display all recordings which match your chosen parameters.
![]()
Selecting Snapshots
In the header of each thumbnail you will see the name of the camera the footage was captured from as well as the time the snapshot was captured.

To select a snapshot just tick the box in the top right corner. You can select multiple snapshots and back them up at the same time.
When a large number of snapshots are found they will appear over multiple pages. To switch between pages use the control arrows in the bottom right corner.
![]()
Snapshot Information
The information pane in the bottom left corner of the screen shows the channel the snapshot was captured from, the time of the snapshot, the snapshot trigger and the file size of the snapshot.
Picture Toolbar Explained
There is also a toolbar at the bottom of the screen to help with your selection as explained below.
![]()
Icon |
Name |
Function |
|---|---|---|
|
Descending Order |
By default the snapshots are in order from oldest to newest. To view the newest snapshot first tick the check box next to Descending Order. |
|
Select |
You can select and de-select all snapshots by ticking or unticking the Select check box. |
|
Save |
Click Save when you are ready to backup. You will be taken to the Backup screen. |
|
Play |
Click Play to view the Picture Preview screen where you can view snapshots before backing up. |
|
Selected |
Shows the number of snapshots selected. |
|
Total Size |
Shows the total file size of all selected snapshots. |
|
Thumbnail View |
Displays snapshots as thumbnail images with camera name and capture time. |
|
List View |
Displays snapshots in a simple list view showing camera name and capture time. |
|
Detailed List View |
Displays snapshots in a detailed list view showing camera name, type, date, time, file size and playback. |
![]() Saving Snapshots
Saving Snapshots
When you are ready to backup your snapshot(s) click the Save button on the toolbar. A Backup window will display where you can choose and manage you backup device. For more information see the Backup section.