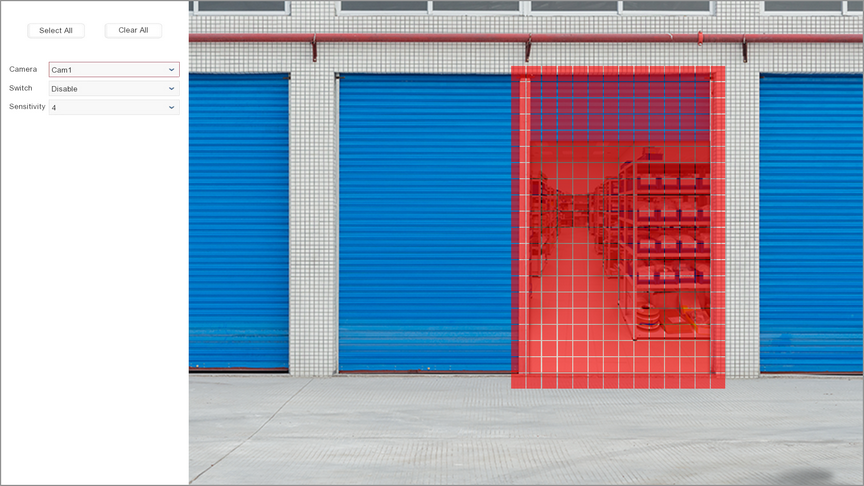
When you click a camera's Setup icon in the Motion Detection sub-menu the Motion Setup screen will be displayed.
As well as allowing you to configure the camera's motion settings, the Motion Setup screen allows you to draw grids to specify the areas of the camera's image you want to observe for motion.
The recorder will then only look for motion within the gridded areas and ignore any motion outside of these. This enables you to specify a doorway or an area around parked vehicles for example.

Setting And Removing Motion Areas
You can create or remove a motion area by left clicking the mouse and dragging over the area you want to select or deselect. You can create multiple motion areas within the cameras image in this way.
Observing The Entire Camera Image
You can click the Select All button to draw a grid over the entire screen to watch for any motion within the camera's image.
Removing All Motion Areas
To remove all motion grids on the camera's image in one go just click the Clear All button.
Camera
You can select which camera's motion settings you want to configure by selecting it from the Camera drop down list.
Switch
The Switch allows you to enable or disable motion detection for the selected camera.
Sensitivity
You can set the sensitivity level for the motion detection from 1 to 8 in the drop down list.
1 is the lowest sensitivity level and will only trigger when there is a large amount of movement inside the defined detection area.
8 is the highest sensitivity level and will trigger when slight movement is detected inside the defined detection area.
Saving Changes
Once you have configured the motion settings as required click the right mouse button to exit the setup screen and return to the Motion sub-menu.