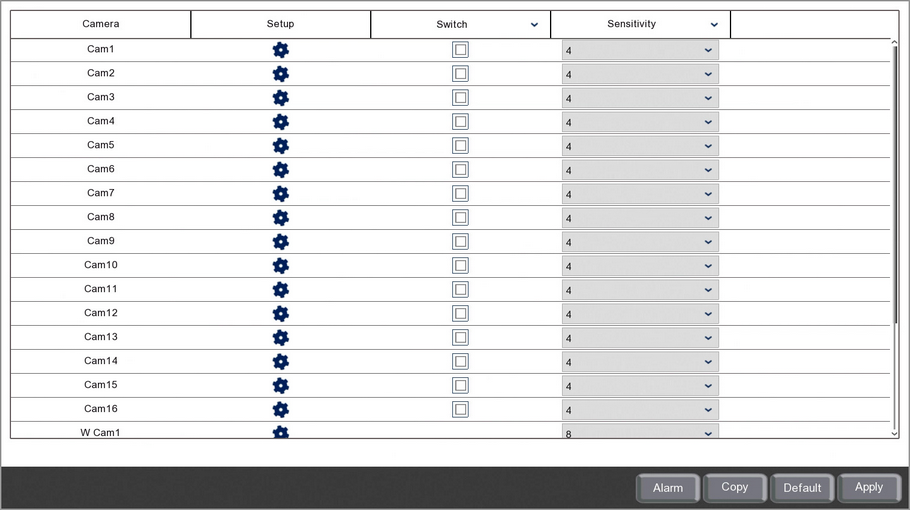
You can setup motion detection for each camera on the recorder in the Motion sub-menu. Setting up motion detection allows you to record footage or trigger an alarm when movement is detected. These are also the same options you will see if you click the Motion button when setting up motion alarms.
The settings available will differ depending on recorder, camera type and camera model.

Camera
Lists all channels on the recorder.
Setup
Clicking the cog icon takes you to the Setup screen for that camera. The Setup screen displays the camera's image as well as the motion detection grid where you can select the detection area.
Switch
Ticking and unticking the Switch check box will enable and disable motion detection for that camera.
Sensitivity
You can set the sensitivity level for the motion detection from 1 to 8 in the drop down list.
1 is the lowest sensitivity level and will only trigger when there is a large amount of movement inside the defined detection area.
8 is the highest sensitivity level and will trigger when slight movement is detected inside the defined detection area.
Alarm Handling
Clicking the Alarm button will open the Alarm Handling screen where you can set what actions the recorder will take when motion is detected for each channel. For more information on setting up alarm handling see the Alarm Menu - Motion section.
Copying Motion Detection Settings
You can copy motion detection settings from one camera to another by clicking the Copy button as explained in the Parameter Copy section.
Defaulting Motion Detection Settings
You can reset all motion detection settings for each camera by clicking the Default button. This will restore factory settings.
Saving Changes
Once you are happy with your settings click the Apply button to save them. Alternatively you can right click with the mouse to exit the Motion menu without saving changes.