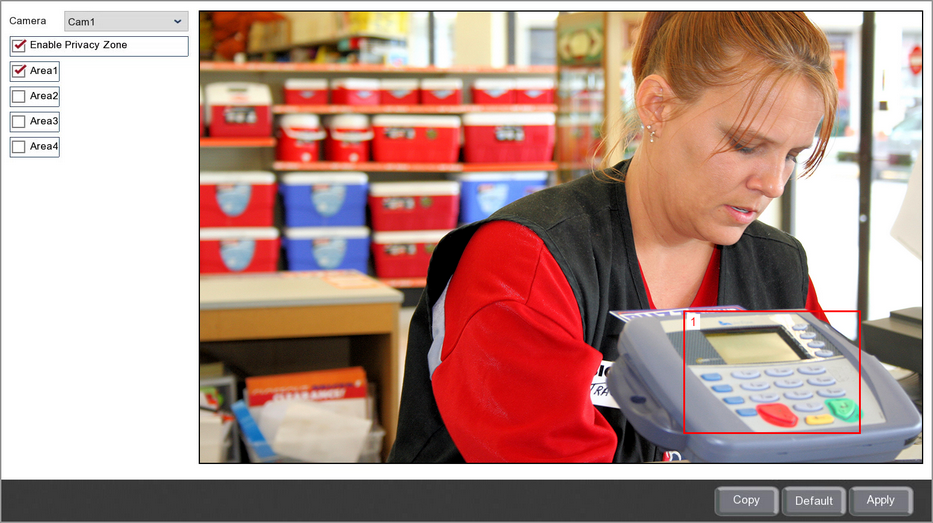
You can create up to 4 privacy masking zones for each channel in the Video Cover sub-menu. This is an easy way to comply with GDPR and data protection as you can mask off sensitive areas of the camera's image.
Settings available will differ depending on the recorder and camera model. For IP cameras privacy masking may need to be set up in the camera itself.

Creating Privacy Zones
It's easy to create and edit privacy zones just follow the steps below.
1.Select the camera you want to add privacy zones to from the Camera drop down list.
2.Tick the "Enable Privacy Zone" check box.
3.Tick the check box of the area you want to create from Area1 to Area4. A red rectangle will appear on screen showing which area of the camera's image will be masked. The area's number is shown in the top right hand corner of each privacy zone.
4.When you are happy with your privacy areas click the Apply button.
Modifying Privacy Zones
1.To resize an area just click and hold the bottom right corner of the red outline and drag it where required.
2.To move an area just click and hold inside the red outline and drag it where required.
3.When you are happy with your privacy areas click the Apply button.
Removing Privacy Zones
1.To remove an area simply untick the check box for that area then click the Apply button.
2.To remove all areas just from the selected camera just click the Default button.
Copying Privacy Zones
You can copy privacy zones from one camera to another by clicking the Copy button as explained in the Parameter Copy section.
Defaulting Settings
To return the settings back to their default values just click the Default button.
Saving Changes
Once you have configured your cameras click Apply to save your new settings.