If you are viewing footage in Playback and you see an incident occur, you can add a Tag to flag the incident and then quickly find it again at a later stage as shown in the Playback - Tag section.
There are 2 types of tags you can add to your footage, a Default Tag or a Customised Tag as explained below.
![]() Default Tag
Default Tag
A default tag is the quickest way of adding a flag to the recorded footage with just one click. However, all of tags are simply called "Tag" so this could get confusing if you create a large number.
![]() Customised Tag
Customised Tag
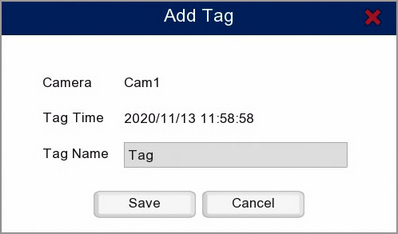
Adding a customised tag allows you to give the tag a memorable name so you can quickly find the right tag without having to check the footage. When you click Customised Tag the following window will be displayed.

Camera: States which camera's footage the tag will be added to.
Tag Time: States the time and date at which the tag will be created.
Tag Name: This is the name of the incident which will appear in the tag list in the playback screen so call it something useful such as "Theft". Click inside the field to edit the name of the tag. The name can be up to 20 characters long and can include alpha numeric and special characters.
Save: Click save to confirm and store your tag.
Cancel: Click Cancel to exit the Add Tag screen without saving changes.